If you can put together a lego set you can swap gears. I've never opened a tranny before and swapped gears on my car just fine. The hewland manual is essential... I used the "pull the stacks out and have them fall into a huge pile method"


If you can put together a lego set you can swap gears. I've never opened a tranny before and swapped gears on my car just fine. The hewland manual is essential... I used the "pull the stacks out and have them fall into a huge pile method"

Hello
The thread is a bit old and I guess that you learned all about changing gears by now.
Here is an instruction that I did
http://www.classicformula.se/downloads/car/mk8.pdf
I'm afraid that the text is in swedish but the pictures might be of some help
/Henrik

henrik,Originally Posted by Henrik

since you are obviously speak swedish and english(from reading your post), is there any way that you could make a simple translation here on this thread for your instruction.
maybe just something like picture #1 says_____________ ;picture #2 says_________in text only. not redo the page you already made.
when i had to do this the first time, your page would have been a big help if i could have understood the text.
I ended up having a generous freind who was patient and taught me how to do the gear change.
Google Translator says...
1st Loosen the M8 bolts and 8pcs
7 off the ¼ "UNF bolts back
on the gearbox
2nd Remove from växellänkaget
derailleur
3rd Place a container
the gearbox to
absorb the oil. Tap
gently on the heel of the
bottom to remove the
back cover.
4th Remove cotter pins
5th Loosen and remove the bolt tensile
the lower axlen.
Push the upper and
lower gear to lock axlen
Drive rate.
Tip:
If it can not be pushed into
both as first in the press
while the upper one wheel
rotated, add the switch to rotate
wheel and push it lower.
Then it should go to press the
the top.
6th Solving the two nuts, the
has a left upper
(Clockwise) the lower
right hand thread (clockwise)
7th Put in a dummy axle.
8th Break between the cover and
stud on the side of the
loosen the inner cover.
9th Position the dummy and axlen
pull the complete drive kit.
10th
11th Remove the lower nut
and remove the lower axllen
from cover.
12th Ensure that the sprockets are in phase
facing each other on 2an
3ans and ran. On 4ans drive
phase shall be the nut.
13th Unplug dummyaxlen
while the sprockets and
dogringarna removed
14th Change the sprockets to the desired.
15th If the ring is loose so it can
fall down and prevent the hood
can be implemented in full. A little grease on the
washer makes it sits on
location
16th Reassemble the drive and 4ans
dogring
17th Reassemble 2an and 3ans
Drive with dogring.
18th Reassemble 1ans drive, giving
sure that the cogs of
slope shall be included in
gear fork.
19th Put the lower axlen see
that the washer is in place
next to the cover. Screw
nut so there are 3-4mm
games remaining. Apply some
RTV Silicone at flänskanten.
20th Apply RTV silicone to
edge and replace it
rear lid
21st Reassemble the drive rate of
gearbox.
Tip:
Spin the wheel for one
splined to the 'take' and so
that it is possible to insert
Drive rate completely.
22nd Reassemble in reverse
order. Reassemble the
long haul bolt (pkt5);
span the light and drop it
then about a yard. Tighten the large
nuts "just right" about 50lbft
and take scissors to the next sprint
holes.
23rd Refill oil in one of
oil plug holes. 1 liter
80w90

Go to Taylor's site and either buy or if possible download the manual.
It will be very valuable for things other than changing gears.
Hello
So, I have made an attempt to translate it. Maybe not the best of english but perhaps better than the Google translation
http://www.hhtech.se/files/hewland_eng.pdf
The Hewland manual can be found here
http://www.hewland-engineering.com/drawings/mk9_man.zip
/Henrik

Reviving an old thread, and boy I'm glad it's still available.
I did my first Hewland Mk9 gear change today and was sure glad all the info from Henrik, Steve, Eyerace, and others is here. I've never seen the insides of a trans-axle before and had no assistance or supervision, just dove right in. It took me half a day as expected, but I'm glad I did it this way as now I'm confident I can do it again.
The tool list, the Hewland manual diagrams, and Henrik's photo-filled how-to's were all I needed. I did have to do the procedure twice as the first time reverse did not work. The reverse button engaged so I thought all was good. But I discovered that as I wiggled all the gears back into place, the reverse gear dropped out of it's fork. At least for this novice, this was the real crux of the procedure. Keeping the reverse gear in it's fork during reassembly is a real challenge. I could use longer, stronger, more flexible fingers for sure.
I'm sure the rubber hose or dummy pinion shaft technique would make things easier and I will try to find the right ones for future changes. If anyone has the inner and outer dimensions of either of these, it would be appreciated.
I did do a little shopping at Pegasus first, the 17mm allen socket and a fresh tube of Hylomar made things a bit easier.
TroyT - SFR SCCA, VARA, CSRG, SVRA
www.ThingsThatGoVroom.net
'00 Carbir CS2, P2 #60
'79 Lola T492, S2 #61

Scott & Troy, I have watched twice (once at the track but the doers were experts) and this winter will attempt my own. I mos def appreciate you reviving this thread! Perfect timing. The detailed list and Henrik's photos and instrux will go in the binder. Pure gold.
Thanks!
David


Oh, I've NEVER done that. And the check is in the mail.
One hint for the last 1/4 inch I've discovered for my particular box that isn't mentioned here: when rocking the rear wheel (on stands) or whole car (on the ground- easier) try doing it with 4th gear engaged so the stack will rotate a bit onto the splines.
I'm hardly a pro, but my last change took about 30 minutes when everything popped right in. That means I'm budgeting a full three hours next time instead of my usual two.
Caldwell D9B - Sold
Crossle' 30/32/45 Mongrel - Sold
RF94 Monoshock - here goes nothin'

I downloaded and took a look at the hewland mk9 manual and I thought I would put up this link to my blog where I documented how I change my gear sets on my LD-200.
Both gearboxes appear similar enough so the instructions should work for you as well. As with most blogs, this has lots of pretty pictures to help.
http://conedogers.com/2013/02/09/how...ewland-ld-200/
Comments and suggestions from the more experienced are always welcomed.
Last edited by chrisw52; 10.12.14 at 1:31 PM.

One of the main reasons to have your gearbox prepped by an experienced professional box shop is all of the fine tuning work that they do to make changing gears easier. They know everything that needs to be chamfered, honed, filed, ground etc. to make the ratio swap job easier. The only reason that the cotter pin hole lines up with the slots in the nut at the right torque is that the contact face of the nut has been ground just enough to line up the slots.
After a lot of experience working with prepped boxes, I changed gears at the track once for a buddy whose box had not been pro prepped. It was amazing how much harder it was to do the job.
In Carroll Smith's most excellent book "Tune to win" he mentions doing away with the cotter pins on the pinion and layshaft nuts by using two nuts on each shaft, both torqued to the recommended 115 ft-lb and 70 ft-lb. The nuts are reduced in thickness so two will fit on each shaft. I've never actually done this, (probably due to the outrageous cost of these nuts), but it seems like it would save some time during a gear change. Anybody have any thoughts on advantages, disadvantages?

How hard and time consuming are the cotter keys? Maybe a neat fix for a hot-pit, hot-track gear change with a pneumatic impact gun, But come on. For us folks changing gears in the shop or maybe track side seems like a solution looking for a problem.
So who's got a dummy shaft they are willing to measure and publish the inner and outer diameters?
TroyT - SFR SCCA, VARA, CSRG, SVRA
www.ThingsThatGoVroom.net
'00 Carbir CS2, P2 #60
'79 Lola T492, S2 #61

There is no measurement for this - it is an old, unusable pinion shaft that you stick down the gearstack to align all of the gears so they will be "more likely" to slide onto the pinion shaft with little fussing. You can go to your local hardware store and buy an ally tube (either 1.00" or 1.125" or 1.250" OD (depending on application), cut it to the proper length and use it from the rear of the gearchange section to hold the stack fairly well aligned and keep the gears from falling down. It gives you something to hold the gearchange section with and will fit over the end of the pinion shft. This helps support the gearstack while you are fiddling with it.
Charlie Warner
fatto gatto racing
'Cause there's bugger-all down here on earth!

Sometimes harder then you might think. I purchased some "just right for Hewlands" cotter pins from Pegasus one year (several of them). Then each time we needed one I spent an extra couple of minutes with a file resizing them so they'd fit!!
CREW for Jeff 89 Reynard or Flag & Comm.
I've used the double nut technique and won't go back for all the cotter pins in China.

Cross-posting this thread with a labeled photo of the gear set...
http://www.apexspeed.com/forums/show...7&postcount=23
OR http://apexspeed.com/forums/showthread.php?t=39935
Found this 9 minute video of re-assembling the gears into the cover but no commentary...
http://www.youtube.com/watch?v=xU6eC8fDMvk
Updated link to Tony Wilson's Mk8/9 instructions...
https://sites.google.com/site/tonywilson43/instff
Last edited by TeamFRD; 11.08.16 at 2:03 PM. Reason: alt link
TeamFRD-1988 Van Diemen RF88-1267 FF1600 Solo:CM#99/199 http://yspect8.weebly.com

Perfect timing. Thx !
"An analog man living in a digital world"

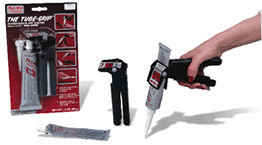
Save more time and agro with this tool when applying Hylomar...........I have used it for years......and it makes the tube of Hylo go way farther. They also have spare tube nozzles so you don't have to push the old out. Valco Cincinnati.
[FONT=Verdana, Arial, Helvetica, sans-serif][SIZE=1]Tube material can also be dispensed in a wider variety of patterns. For example, you can easily use a small orifice tip for a very fine precision line, or it can be dispensed in a flat, ribbon-type pattern. The Tube Grip can dispense the thickest sealant through a very small opening, permitting better application control. The Tube Grip reduces both cleanup time and the possibility of skin contact or other problems caused by excess material squeeze-out.[/SIZE][/FONT]

Or you can be a cheapskate and reuse the Hylomar. I've gone a whole year - 6 changes - on one application.
I have correction to post #39. Step 2 should say: 2. Fourth gear (bevel down) -- meaning toward the cover. Tony Wilson and the Hewland manual have it this way.
Looking for an 18/32 and 25/27 for sale. Anyone out there selling?

I have a spare set of each, send me a pm or email to discuss it
There are currently 2 users browsing this thread. (0 members and 2 guests)
 Posting Permissions

 Reply With Quote