Page 1 of 3 123 LastLast
Results 1 to 40 of 86
  1. #1
    Senior Member
    Join Date
    01.24.15
    Location
    Morgantown, WV
    Posts
    197
    Liked: 131

    Default AMAC P2 Build Thread

    Hi Guys,

    I used to post on here more, but I have started a business, had a couple kids, building a house, etc. Fortunately my wife is still letting me play with race cars, and I recently sold my FC and upgraded to P2.

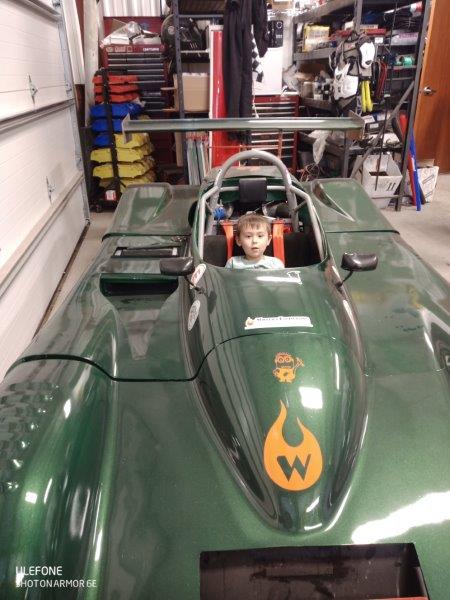
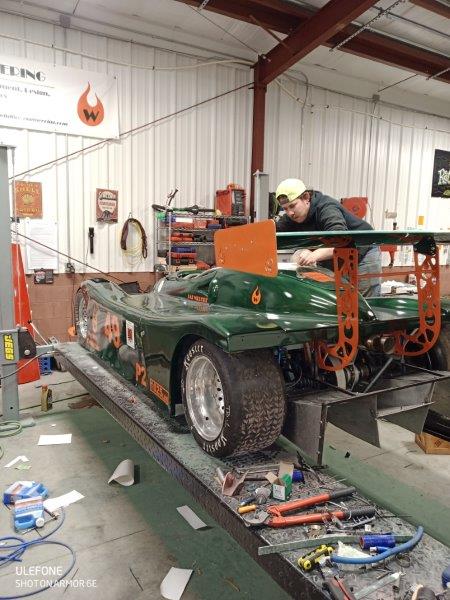
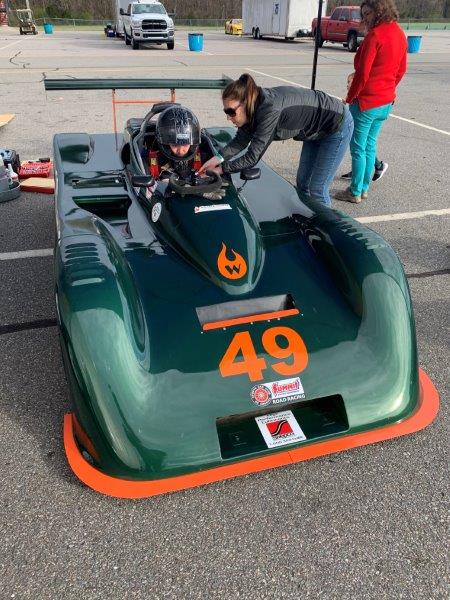
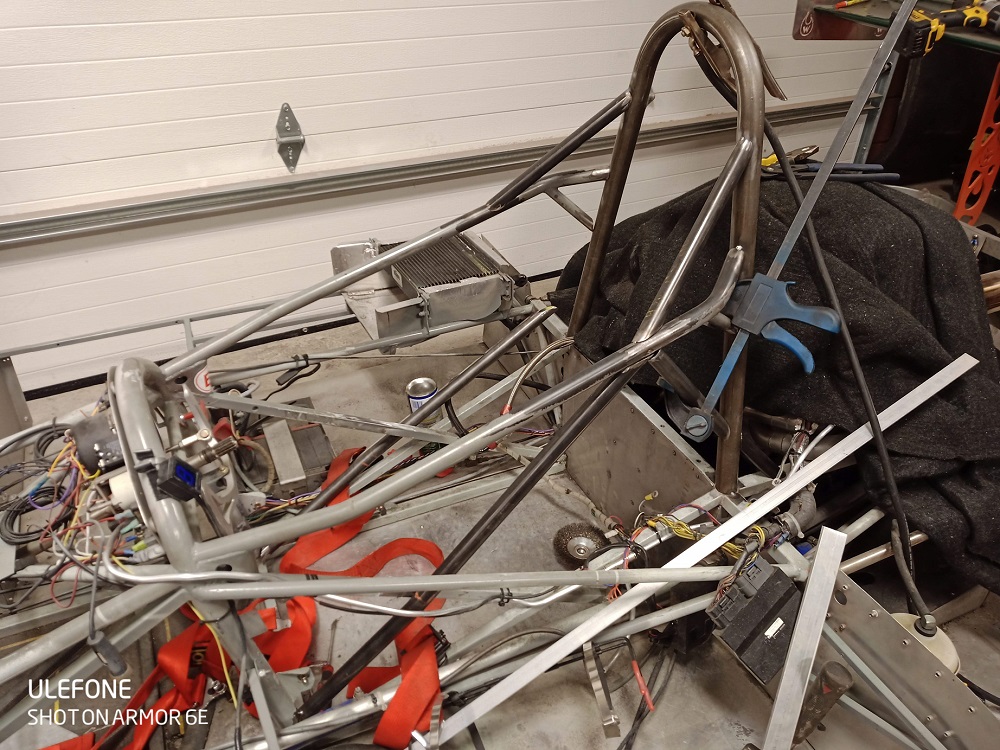
    The new car is a '98 AMAC AM-7, which I think most people consider kind of dated for P2, but I like the car and I think with a few tweaks it can still be competitive. So I figured I might as well document the build for your entertainment. Feel free to comment!

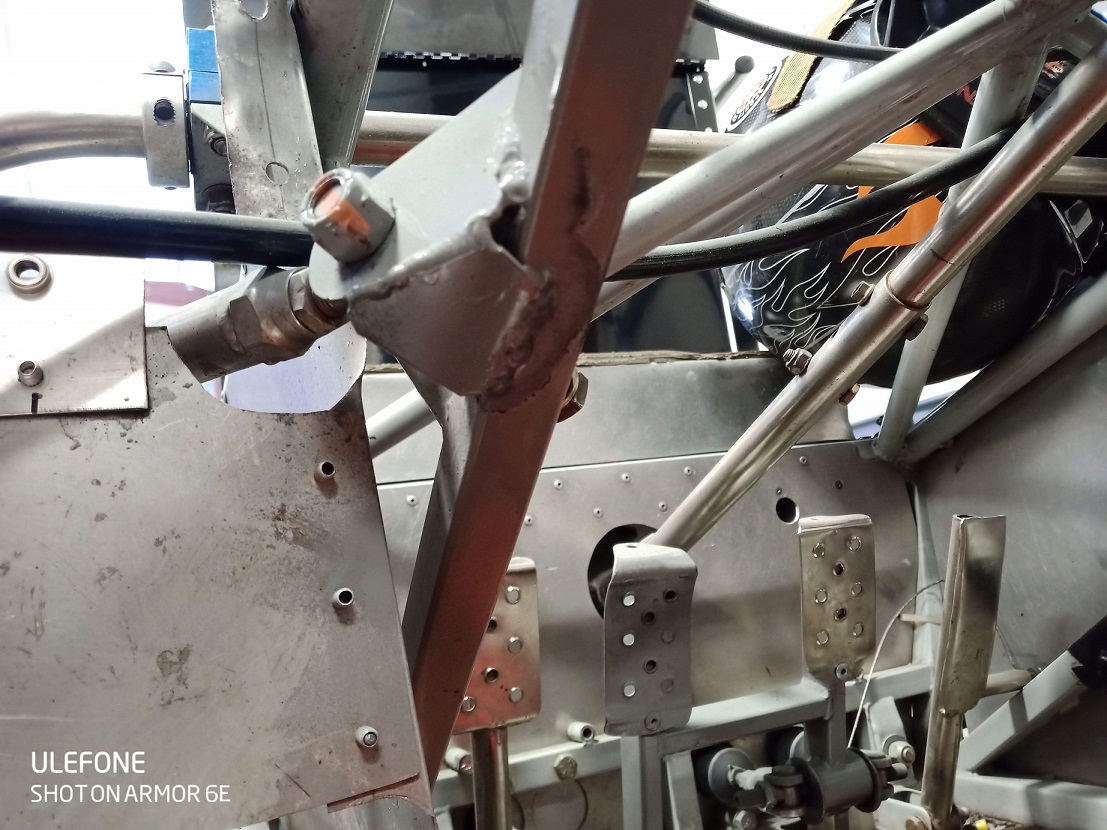
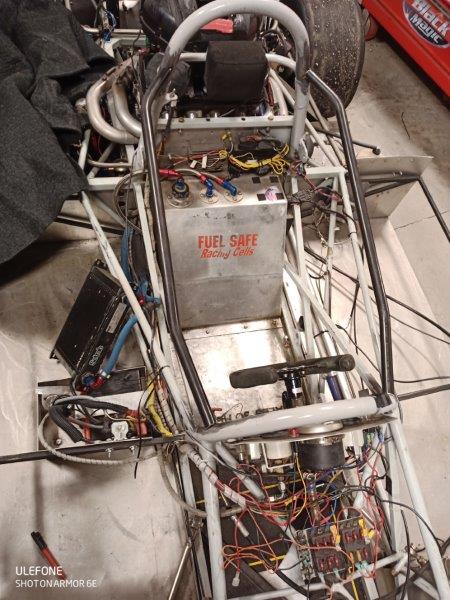
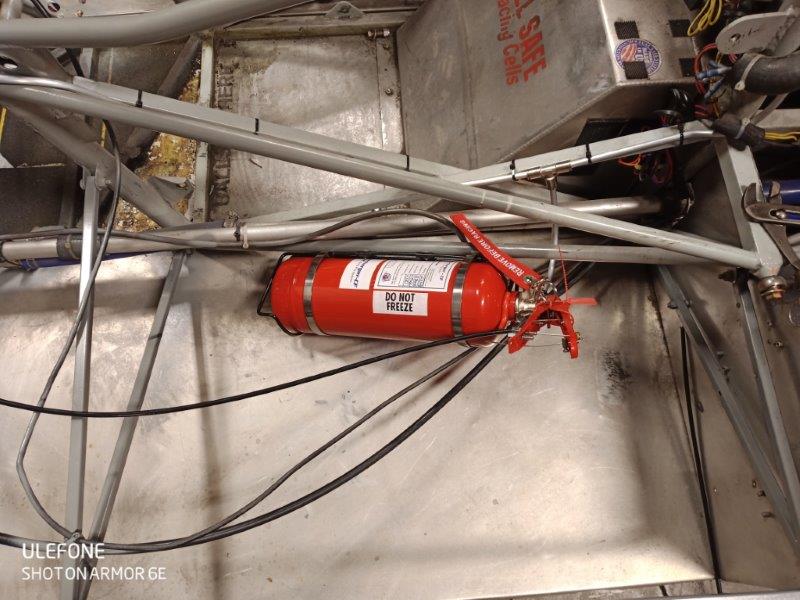
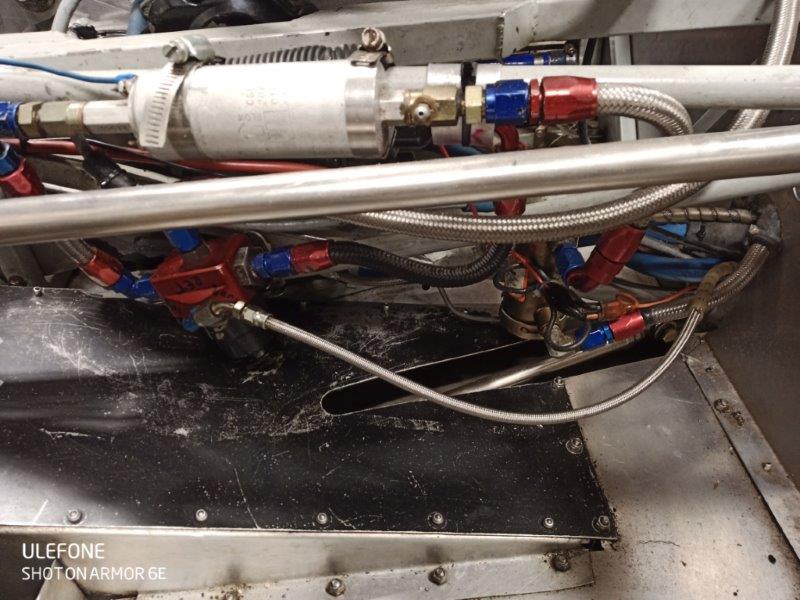
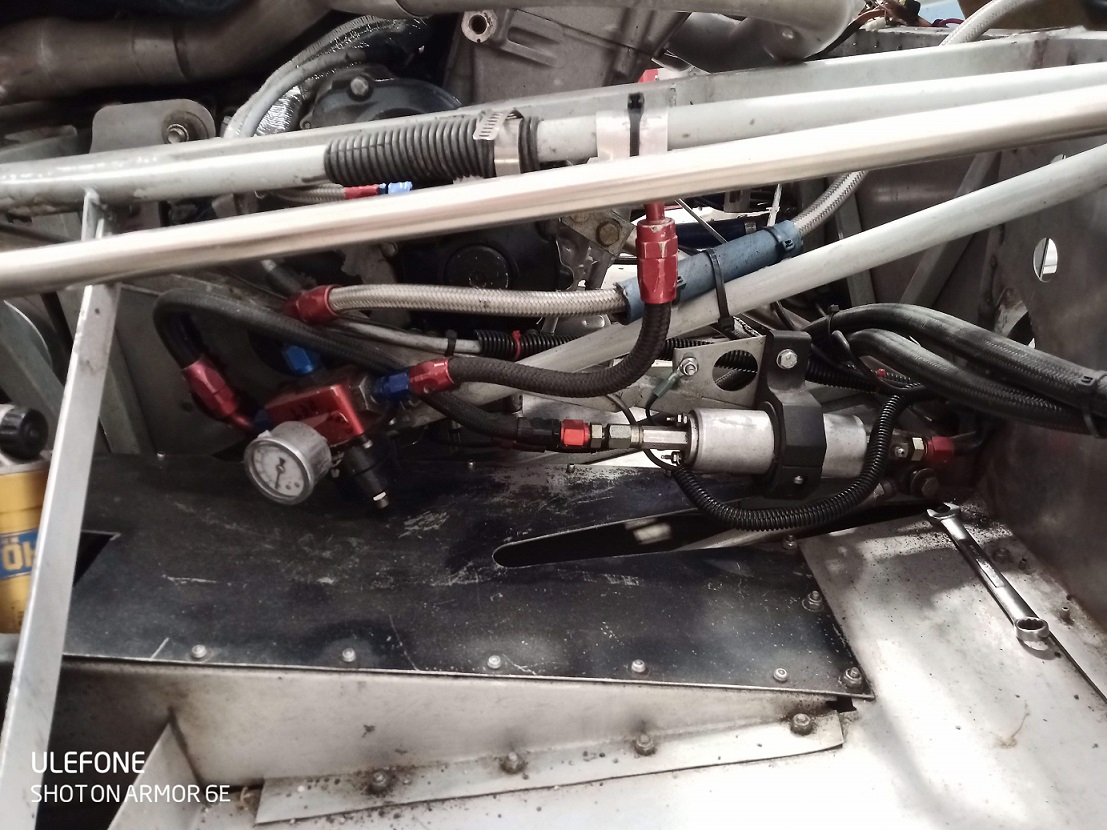
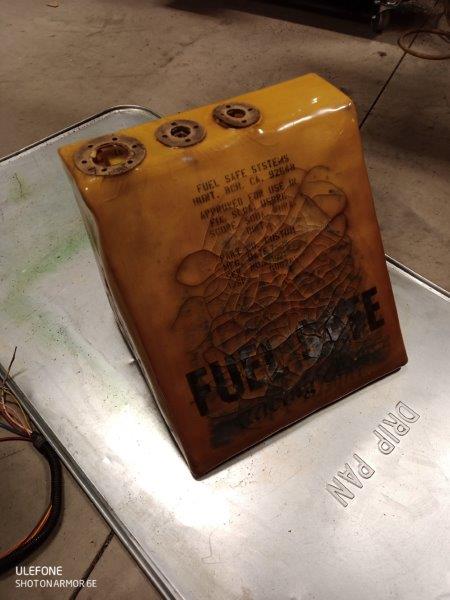
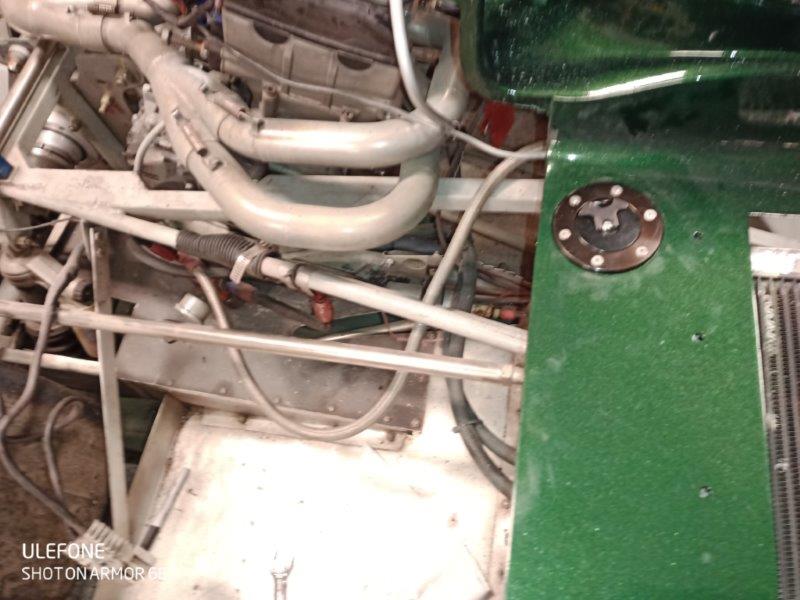
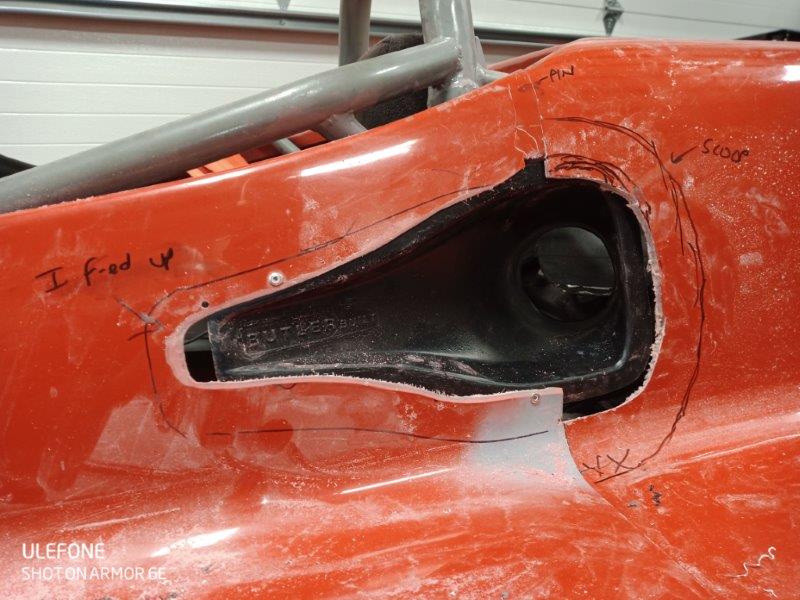
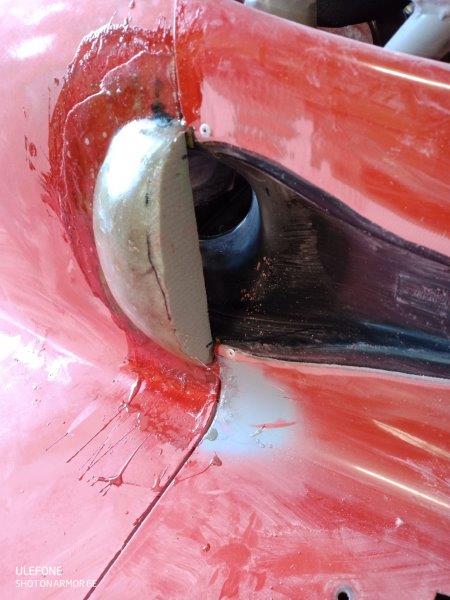
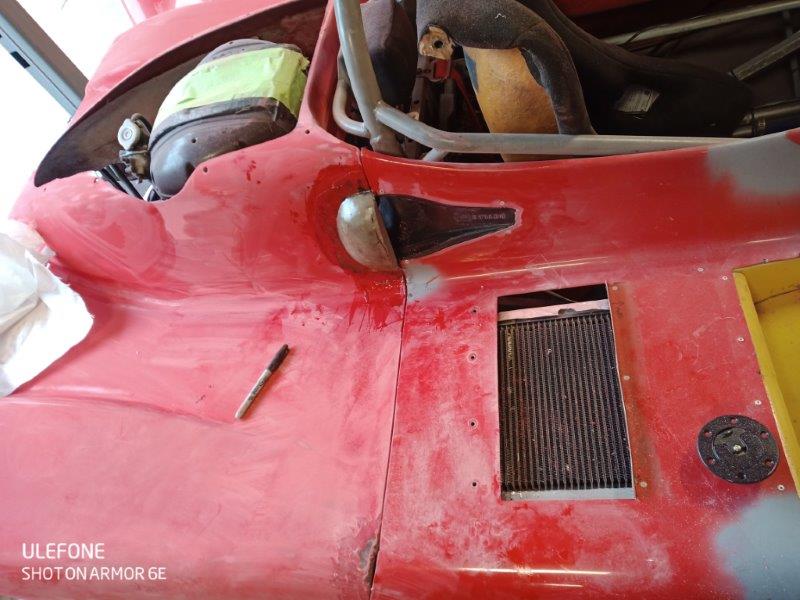
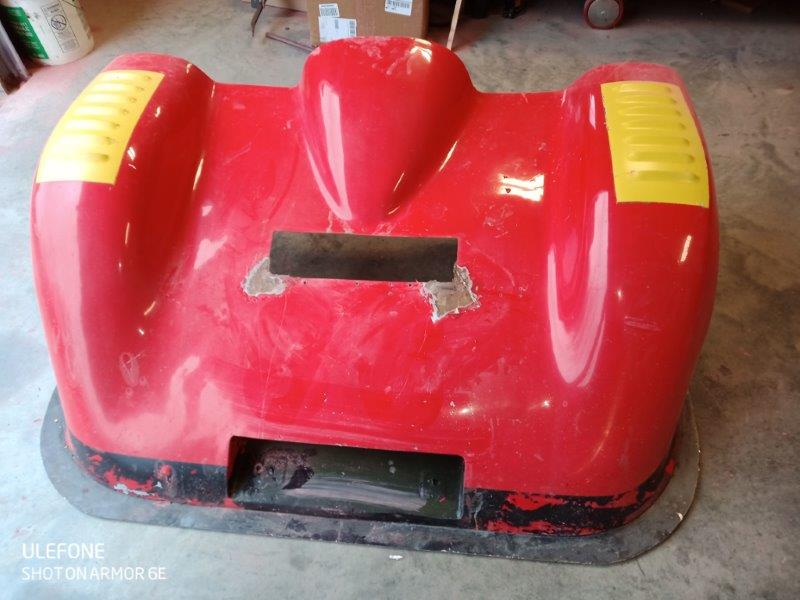
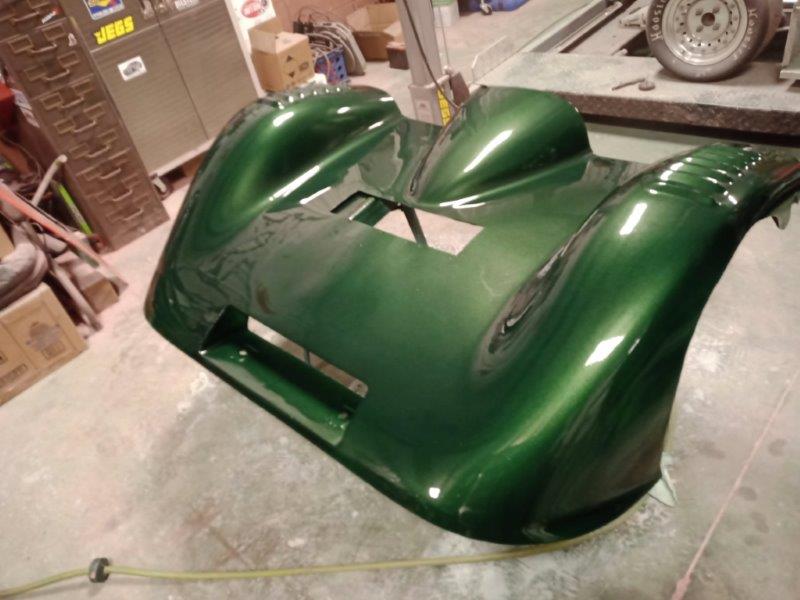
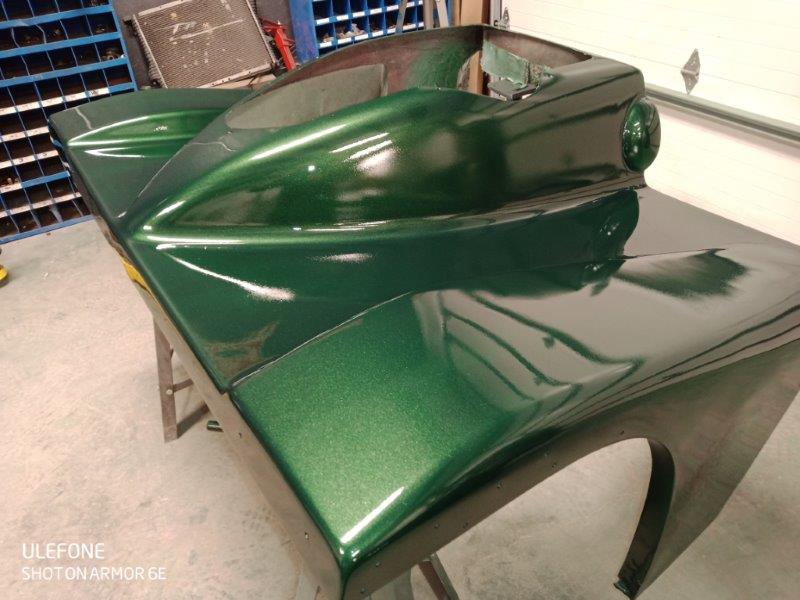
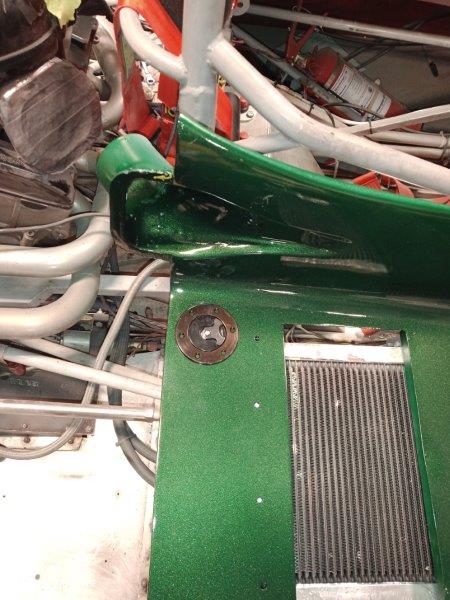
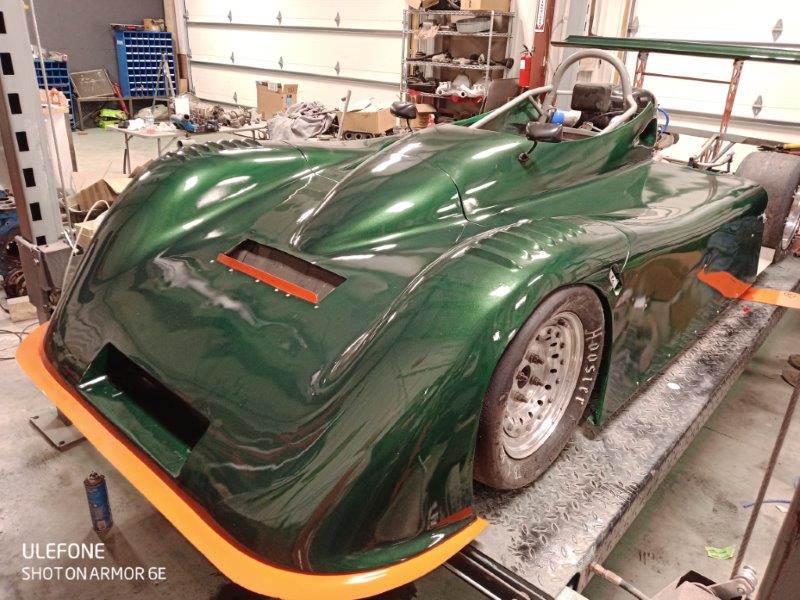
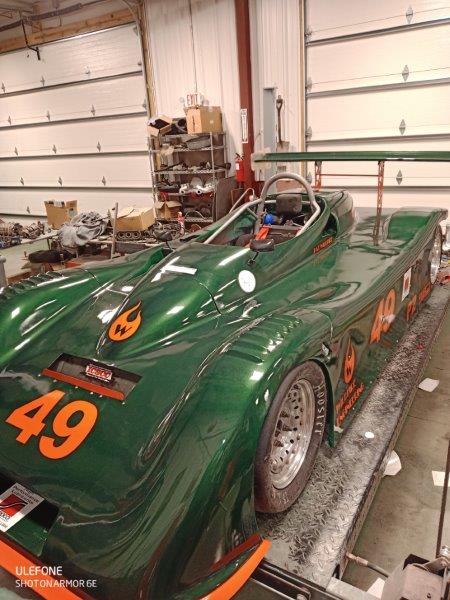
    Here is the car as received:


    More to come.....

  2. The following 2 users liked this post:


  3. #2
    Senior Member
    Join Date
    01.24.15
    Location
    Morgantown, WV
    Posts
    197
    Liked: 131

    Default

    Initially I had plans for a some upgrades, but upon inspection of the car I found a lot of maintenance/safety things I thought needed attention, so I tried to address those first. I managed to slip a few upgrades in too I think.

    First, all of the front inboard control arm mounts were not captured. This is safety concern and has been outlawed by some series, since if you crash and the rod end fails, you end up with a nasty sharp tube being pushed through the cockpit. Since I like my legs without holes in them I decided to take care of that:

    Before (see control arm inboard mounts)


    After (lower and upper, might be kind of hard to see)


    Next was the main hoop forward supports. I have pretty wide shoulders and it was near impossible for me to get out of the car by myself, so these needed to be widened sorry no before pic, you can see it in the one with my kid:


    Another safety concern was the original to the car Halon fire system, so I replaced with a new ColdFire system which should be a little more effective and less problematic should I ever need it:


    More in next post
    Last edited by patman; 07.26.20 at 10:49 AM.

  4. #3
    Senior Member
    Join Date
    01.24.15
    Location
    Morgantown, WV
    Posts
    197
    Liked: 131

    Default

    There were lots of other odds and ends about the car I wasn't happy with:

    There were lots of cheesy brackets around the car that were hose clamped to the frame. I cleaned up all of these with welded tabs and rivnuts.

    The fuel system was a mess: there were two pumps in series, and several sketchy lines. In addition, the first time I tried to test the car, I ended up driving to the track for nothing as the fuel cell bladder was shot. Since I had to replace the bladder, I was able to add a vent, and a fill tube to eliminate the giant funnel required to fuel the car:

    Pump mess


    Brackets clamped on


    Fixed pump and bracket


    Old junk bladder


    New tank, fabricating fill hose


    Gas cap:


    Next: body work

  5. #4
    Senior Member
    Join Date
    01.24.15
    Location
    Morgantown, WV
    Posts
    197
    Liked: 131

    Default

    I'm not really into body work, and the car looked OK with the vinyl wrap, but there was some damage underneath it, and also a couple things I didn't care for.

    For one, I didn't love the look of the intake scoop, and much more important, I have a HUGE pet peeve about cars where the filter comes off with the body work. So I needed to find a way to make the filter part of the engine instead of the engine cover. Cue the garden foam and fiberglass....

    Another issue was the oil cooler which was attached to the middle body section. This made removal of bodywork a huge pain.


    So, I added a frame mount and ducting for the oil cooler, and I came up with an intake system that allowed use of the stock GSXR airbox and filter.

    Oil cooler mount welding was a little tricky


    First step in the intake plan (note even geniuses make mistakes every once in a while....)


    Moving on


    Test fitting


    A little bit of body repair (there was a LOT more that I didn't take pictures of)


    Paint time


    Putting it all together


    Add some vinyl (and a little punk for decoration)


    I have lots more completed work, and a lot more left to do too, but I'm out of time for today. Please post any questions/comments!
    Here is a sneak preview of where we are headed

  6. The following 9 users liked this post:


  7. #5
    Contributing Member lowside67's Avatar
    Join Date
    02.06.08
    Location
    Vancouver, BC, Canada
    Posts
    462
    Liked: 231

    Default

    Wow, you've been busy - looks great! I just recently bought a "project" (to put it mildly) Stohr DSR which I am going though a similar journey to pull apart, improve and repair, and hopefully get out on track so I can very much appreciate the "I thought I was going to do XXX but when I pulled it apart, I saw A, B, and C all of which I need to fix".

    -Mark
    Mark Uhlmann
    Vancouver, Canada
    '12 Stohr WF1

  8. #6
    Contributing Member Offcamber1's Avatar
    Join Date
    11.09.10
    Location
    West Union, IL USA
    Posts
    892
    Liked: 319

    Default for a guy who states he's not into bodywork

    I looks splendid!
    Lola: When four springs just aren't enough.

  9. The following 2 users liked this post:


  10. #7
    Senior Member
    Join Date
    12.20.04
    Location
    Denver, CO
    Posts
    644
    Liked: 80

    Default

    Fun to see - thanks for sharing

    Keep it up!

    -J

  11. #8
    Senior Member 924RACR's Avatar
    Join Date
    10.16.08
    Location
    Royal Oak, MI
    Posts
    682
    Liked: 270

    Default

    Nice work! All that effort to make things clean and proper will start paying off immediately, as you obviously know.
    Vaughan Scott
    #77 ITB/HP Porsche 924
    #25 Hidari Firefly P2
    http://www.vaughanscott.com

  12. #9
    Senior Member
    Join Date
    01.24.15
    Location
    Morgantown, WV
    Posts
    197
    Liked: 131

    Default

    Thank you all for the kind words!

    Today's installment will be about the rear wing; there were several things I didn't like:
    1) It was mounted to the bodywork and not the chassis
    2) Didn't look great to me
    3) Was not an efficient wing profile
    4) Made it hard to get to anything on the back of the car

    As such, it had to go. In the past I have built composite wings, but my foam core supplier went out of business, and I have become a dealer for Nine Lives Racing, which offers aluminum wing extrusions in one of my favorite profiles. I wish I had thought of that idea, it makes wing building so much nicer!

    So I bought a piece of extrusion from them, designed some mounts which I had water-jetted, and did a little more welding:

    Wing upright fresh from cutting (also intake duct adapter, coolant swirl tank, and my lunch...)


    Mounts welded to chassis


    Installation process (2 days before first VIR event, so excuse the mess)


    Pretty much finished


    That's all I have time for today, tomorrow we will talk about differential mounting.

  13. The following 3 users liked this post:


  14. #10
    Contributing Member
    Join Date
    12.26.13
    Location
    Woodstock, NY
    Posts
    222
    Liked: 81

    Default

    Great project!
    Creating and improving is always interesting and fun.
    The only question I have is regarding the bends in the forward supports for the rear hoop.
    My understanding was that they were "required" to be straight.

  15. #11
    Classifieds Super License BeerBudgetRacing's Avatar
    Join Date
    09.04.13
    Location
    Goleta, California
    Posts
    4,173
    Liked: 1261

    Default

    Quote Originally Posted by ChristopherBernard View Post
    Great project!
    Creating and improving is always interesting and fun.
    The only question I have is regarding the bends in the forward supports for the rear hoop.
    My understanding was that they were "required" to be straight.
    The first two pictures are before his changes and they are bent too. They are bent on my vd fc too.
    So..... hmmm...

  16. #12
    Senior Member
    Join Date
    01.24.15
    Location
    Morgantown, WV
    Posts
    197
    Liked: 131

    Default

    Quote Originally Posted by ChristopherBernard View Post
    The only question I have is regarding the bends in the forward supports for the rear hoop.
    My understanding was that they were "required" to be straight.
    Per GCR 9.4.5 (C) 1:
    The main hoop must have 2 forward braces extending from the hoop and attached to the frame,monocoque, or front hoop. etc...

    There is nothing about these being straight. Of course they are stronger if they are straight but the world is not perfect.

    Also important is that many formula and sports racing cars take advantage of section (F) of the same chapter:

    Any roll hoop design which does not comply with the specifications in 9.4.5, will only be consideredif it is accompanied by engineering specifications signed by a registered engineer stating that thedesign meets the stress loading requirements below.

    Meaning you can do whatever you want as long as your prove that it will handle the SCCA design loading.


    Also, minor error on my part: the second picture is after the roll hoop was modified. I didn't look close enough. Looks like I don't have a good before picture from that angle. I tried to do a test day after all the safety stuff was done to try and benchmark the car with the original bodywork and before some of the other changes, but then found the leaking fuel cell, so I went ahead and did all the body work and other stuff before I got to drive the car.

  17. The following members LIKED this post:


  18. #13
    Senior Member Farrout48's Avatar
    Join Date
    04.22.17
    Location
    Florida
    Posts
    241
    Liked: 133

    Default

    This is the roll hoop and side bar configuration previously.
    Attached Thumbnails Attached Thumbnails Click image for larger version. 

Name:	AMAC 2014 1.jpg 
Views:	116 
Size:	205.1 KB 
ID:	93396   Click image for larger version. 

Name:	AMAC Side.jpg 
Views:	1930 
Size:	204.2 KB 
ID:	93397  
    Craig Farr
    Stohr WF1 P2

  19. #14
    Contributing Member
    Join Date
    12.27.08
    Location
    St. Louis, MO
    Posts
    361
    Liked: 98

    Default Wing Location

    This is only my opinion but it looks to me that the new wing is a bit too high and too far forward. It is now located in about the same place that I originally mounted one on my old DSR. For our final season I dropped it down about a foot and moved it back about the same and got a huge boost in download. I think it would be a fun experiment to have a couple of different wing supports cut to allow a comparison on your car.
    Marty

  20. The following 2 users liked this post:


  21. #15
    Grand Pooh Bah Purple Frog's Avatar
    Join Date
    04.03.01
    Location
    Havana, Fl, USA
    Posts
    10,776
    Liked: 3787

    Default

    What a great job bringing the old girl up to new higher standards!

    I have one problem... I feel that the fuel filler should not be attached to the side bodywork. In a shunt, if that bodywork gets impacted, displaced, or torn off, then you will have an open fuel filler next to your shoulder. Not sure i would pass that modification. Just saying.

  22. The following 3 users liked this post:


  23. #16
    Senior Member
    Join Date
    01.24.15
    Location
    Morgantown, WV
    Posts
    197
    Liked: 131

    Default

    Quote Originally Posted by Purple Frog View Post
    What a great job bringing the old girl up to new higher standards!

    I have one problem... I feel that the fuel filler should not be attached to the side bodywork. In a shunt, if that bodywork gets impacted, displaced, or torn off, then you will have an open fuel filler next to your shoulder. Not sure i would pass that modification. Just saying.
    There is a one-way valve on the fuel cell for that reason!
    I would have liked to put it somewhere else but that was the safest place I could find within reasonable distance from the tank.

  24. #17
    Senior Member
    Join Date
    01.24.15
    Location
    Morgantown, WV
    Posts
    197
    Liked: 131

    Default

    Hi All,

    OK, today's installment will be all about the rear diff. Not very exciting, but there was a lot of work to do here.
    You can see in the before photo that the main diff supports have been repaired at the lower left in a somewhat questionable fashion. In addition, there are lots of stacks of washers that I can't stand.


    Turns out, the reason for the side plates being broken was likely because the spacer blocks were the wrong thickness, which had everything in bending. So I made some new side plates from thicker material, and milled the spacers to account for the new thickness and the previous error as well. While I was at it I replaced the bearings and did a quick R&R on the differential.

    New side plate getting holes contersunk


    Milling the spacer plates


    All fixed up. One thing not shown is that the belleville washers inside were installed improperly so I doubt the Torsen was working very well...


    Another thing I noticed when I was working on this is that the drive flanges had considerable play on the axles. After some discussions with Taylor (who were very helpful), I was able to determine that this was due to the internal splines on the flanges being worn. Sadly this is beyond the capability of my machinery so I had to CAD some up and actually pay one of my local shops to a make me some new ones (of course I tweaked the design a little bit, one set of holes are for 5/16 bolts, the other are M8, and all are marked on the outside raidus so you don't confuse the two):


    Here is the final product all installed and adjusted (notice proper spacers)


    One thing I am not super happy with is the adjustment mechanism on for setting chain tension. I will be addressing that at some point in the coming months, so I'm sure the solution will show up on here at some point.

    I have a couple of more completed projects to show y'all and then things will slow down as I try and find time to work on the car.

  25. #18
    Grand Pooh Bah Purple Frog's Avatar
    Join Date
    04.03.01
    Location
    Havana, Fl, USA
    Posts
    10,776
    Liked: 3787

    Default

    You must understand I really really like the job you are doing. Just want you to be safe for that kid in the pictures. Some of us old timers have survived some pretty horrendous wrecks, so we get a bit safety conscious in our old age.

    One time i climbed out of a chassis in Thunder Valley. That chassis had no wheels, no body, no wings, no gearbox. Just me and the engine. I was really glad we had serious construction rules in term of safety.

    In post #3. There is a picture of the cell and the filler before you fabbed the hose in between. If... in a wreck that hose was ripped off, you would feel safe? Upside down? If so... OK. I'm just saying there is a reason we don't do it that way. YMMV

    Keep up the good work!
    Last edited by Purple Frog; 07.28.20 at 9:49 PM.

  26. The following 3 users liked this post:


  27. #19
    Senior Member 924RACR's Avatar
    Join Date
    10.16.08
    Location
    Royal Oak, MI
    Posts
    682
    Liked: 270

    Default

    I'll be interested to hear if you come up with any improvements to the chain tensioning; mine's tensioned in the same fashion, and it is indeed a pain to work with, would love to streamline it...
    Vaughan Scott
    #77 ITB/HP Porsche 924
    #25 Hidari Firefly P2
    http://www.vaughanscott.com

  28. #20
    Senior Member
    Join Date
    01.24.15
    Location
    Morgantown, WV
    Posts
    197
    Liked: 131

    Default

    Sorry I have been pretty busy lately and no time to add to this. On the plus side I actually have had a little time to work on the car, so some new updates will be coming soon. As to the original re-build, we are almost finished, so here are the last few items:

    One more little item that bothered me was the cooling system plumbing: there was no reservoir, and the whole engine bay portion was rubber hose with various couplings. This was all just clamped to the airbox. Made me nervous, and was also a perfect excuse to fix up the bead roller that I got years ago and never got working.

    This is the only before picture I have


    Fitting the aluminum tubing


    New surge tank was shown partially finished in another picture, but here it is installed.


    One thing that was really cool about this car is that the some of the previous owners had kept a maintenance log book. They kept track of hours, tracks run, lap times, setups, notes, etc. This is SO nice to have as a new owner of an old car, so a big thank you to Craig and Tom, and anyone else who contributed to that!

    One last item that I needed to fix was wiring. I disliked the way the wiring was done as soon as I saw it, and when I read through the log book, unsurprisingly there were more DNFs due to wiring issues than anything else.

    IMO, fuses don't belong on a race car


    There were many other issues, but I didn't take pictures. I plan to rewire the car from scratch, but that is a winter project if I ever heard of one, so for now I just fixed it up as quick as I could. All the fuses went away and replaced with circuit breakers that I can reset on track if they pop:


    The wiring behind that was also cleaned up, but again I forgot to take a picture.

    So, finally, we are ready for some action!
    As I mentioned before, I got the car in October with the intention of testing before winter, but the fuel cell failure cancelled that. So I was itching to try it out this spring, and managed to get it ready for VIR on March 14.

    As we already know I had some roll hoop issues, but I was able to complete a couple practice sessions and race on Saturday.
    First things first, I LOVE the car. I love the bike motor sound and power, and the car handles wonderfully. There is a little room for improvement here as I didn't have time for alignment or corner balancing, and have not started aero tuning yet, but it was quite good as is.

    There was only one other P2 car, a West WX10, with whom I was having a great race. Sadly, the panel under the engine came loose halfway through the race and made such a horrible sound I thought the car had come apart, so I finished 2/2.

    This was only my 2nd time at VIR ever and first in this car, and I was able to get down to a 1:59, which I was very happy with!


    Next up will be roll hoop modifications, which I am working through right now in preparation for PittRace at the end of the month.

  29. The following members LIKED this post:


  30. #21
    Senior Member
    Join Date
    01.24.15
    Location
    Morgantown, WV
    Posts
    197
    Liked: 131

    Default

    Well I was too busy this weekend, but I had a little free time this afternoon, so I made some progress on the new roll hoop.
    The old hoop as best I could tell was shortened about 12" from the original AMAC design. I have no idea why they did this, but when I measured, I only needed to add about 4.5" to be within the rules. I went ahead and added 6.5" just to be on the safe side or in case someone taller than I ever drives the car.

    My plan was to try and re-use the forward bracing if I could make it work with the rules, and if not to make a more diagonal brace that would. I couldn't find an elegant solution to this though, and after watching Ford v Ferrari this weekend, I decided my kids would appreciate error on the side of caution, so I used both tubes instead. I probably will have to switch to a Lithium battery to cancel out the weight, but no big deal. Note that there are a couple of horizontal tubes missing from the below pictures.

    Here is the first side all fitted. Will match the far side to this tomorrow and test fit the body, then weld it all out hopefully later this week.


    A little closer you can see the extra tubes to triangulate the bracing. (note the 3/4" tube from before that the clamp is hooked to will be removed). I can't weld these tubes in until the main welds are finished hence the clamp.


    More to come when I have time.

  31. The following members LIKED this post:


  32. #22
    David Arken sccadsr31's Avatar
    Join Date
    04.24.07
    Location
    San Jose
    Posts
    272
    Liked: 83

    Default Amac

    This is a great project and with your continued work it will be more competitive than many people think. I'll be happy to share information on what we did to mine over the years of ownership.
    I converted mine to inboard shocks with pushrods. The engine is a 2010 ZX10R, very good engine platform.
    The front splitter is a foam core wing with a 22in cord and the rear is a Dauntless or a profile from NACA that we also made with a foam core.
    David
    b
    Attached Thumbnails Attached Thumbnails Click image for larger version. 

Name:	Car at Runoffs.JPG 
Views:	1722 
Size:	141.4 KB 
ID:	93694   Click image for larger version. 

Name:	IMG_8141.jpg 
Views:	1678 
Size:	124.0 KB 
ID:	93695   Click image for larger version. 

Name:	IMG_8277.jpg 
Views:	110 
Size:	156.2 KB 
ID:	93696  

    Click image for larger version. 

Name:	Front Shock.jpg 
Views:	148 
Size:	145.7 KB 
ID:	93697   Click image for larger version. 

Name:	Front Roll Bar Rate.jpg 
Views:	138 
Size:	161.1 KB 
ID:	93698   Click image for larger version. 

Name:	IMG_0243.jpg 
Views:	1730 
Size:	164.3 KB 
ID:	93699  

    Click image for larger version. 

Name:	IMG_0241.jpg 
Views:	1701 
Size:	153.2 KB 
ID:	93700  

  33. The following 4 users liked this post:


  34. #23
    Contributing Member
    Join Date
    10.08.06
    Location
    San Jose, Ca
    Posts
    714
    Liked: 89

    Default

    Quote Originally Posted by patman View Post
    The old hoop as best I could tell was shortened about 12" from the original AMAC design. I have no idea why they did this, but when I measured, I only needed to add about 4.5" to be within the rules. .

    A little closer you can see the extra tubes to triangulate the bracing. (note the 3/4" tube from before that the clamp is hooked to will be removed). I can't weld these tubes in until the main welds are finished hence the clamp.


    More to come when I have time.
    How did you determine that the roll bar is 12" shorter than the original design? I'm pretty sure that roll bar is original.
    Is your upper 1" roll bar support tube supposed to be a continuous tube? I was under the impression it is supposed to be but need to go back and check. It may need an engineer signoff as this isn't as designed and homologated. What wall thickness did you use? Its hard to tell, but the upper connection to the roll bar seems lower than 6" from the top of the bar, which is the lowest it can legally be from the top.
    Last edited by 10rmotor; 08.16.20 at 11:56 AM.

  35. #24
    Contributing Member
    Join Date
    10.08.06
    Location
    San Jose, Ca
    Posts
    714
    Liked: 89

    Default

    Quote Originally Posted by Marty Nygard View Post
    This is only my opinion but it looks to me that the new wing is a bit too high and too far forward. It is now located in about the same place that I originally mounted one on my old DSR. For our final season I dropped it down about a foot and moved it back about the same and got a huge boost in download. I think it would be a fun experiment to have a couple of different wing supports cut to allow a comparison on your car.
    Marty
    The wing is where it is after a lot of trial and testing. Too far forward means downforce generated is acting on the bodywork and isn't helping activate the diffusers, or working against the ground where it should. Also there is less leverage.

    Early on we tried a few designs to mount the wing to the chassis but they ended up being fairly flimsy and added a lot of weight. Almost every Amac has the wing attached to the bodywork, and with only one diagonal strut, is quite sturdy and doesn't vibrate at speed at all, compared to other cars with chassis mounted wings. Some are so bad they look like a bird flapping its wings while at speed. Also, with the wing fixed to the chassis, its almost required to have two people to remove the bodywork to lift it up, forward, and back over the wing. One person can easily install the tail on the car with the wing attached to the body.

    I too am not excited about installing a filler plate for the fuel cell in the bodywork. I've seen center sections ripped off in heavy crashes and don't think an open fuel cell when that happens is a good idea. Most of us use simple fuel siphons to fill the cell, and use a dip stick to check the fuel level, which is impossible with your setup now. Since its in the drivers compartment, the connection needs to be metal or braided line, can't tell if that's the case in this setup. If it is a solid pipe, or even a braided line, how can you be sure that in a bad enough crash the bolt ring in the cell won't get ripped out?
    Last edited by 10rmotor; 08.16.20 at 12:02 PM.

  36. #25
    Contributing Member
    Join Date
    12.27.08
    Location
    St. Louis, MO
    Posts
    361
    Liked: 98

    Default

    Morning David,
    My wing comment was based on a couple of patman's photos which appear to have the leading edge of the wing in the same plane as the rear tangent of the tires. This is farther forward the Amacs I am familiar with. Since patman has his wing chassis mounted, I though it would easy for him to experiment.
    I do have a funny story about my own wings. When I first built the DSR, I made two foam core wings; both to Eppler sailplane profiles but with different chords. At my first event at Gateway I was maxed out a bit over 130 MPH. As I pulled back into the pits, a guy stopped by and introduced himself as an engineer at Boeing and asked me if I designed the wings for a 10" wing tip droop. I immediately swapped to the other wing and all was well with the world. He also pointed out that I was getting reversion out of the radiator inlet duct but that was easy to fix with a rolled piece of aluminum and some duct tape. Helped lower the water temp too!
    Marty

  37. #26
    Contributing Member
    Join Date
    10.08.06
    Location
    San Jose, Ca
    Posts
    714
    Liked: 89

    Default

    Quote Originally Posted by Marty Nygard View Post
    Morning David,

    Marty
    You talking to me? This isn't David!

  38. #27
    Contributing Member
    Join Date
    12.27.08
    Location
    St. Louis, MO
    Posts
    361
    Liked: 98

    Default

    Sorry Ted, I never could keep you AMAC guys from San Jose straight.

  39. #28
    David Arken sccadsr31's Avatar
    Join Date
    04.24.07
    Location
    San Jose
    Posts
    272
    Liked: 83

    Default Wrong Guy

    Quote Originally Posted by Marty Nygard View Post
    Morning David,
    My wing comment was based on a couple of patman's photos which appear to have the leading edge of the wing in the same plane as the rear tangent of the tires. This is farther forward the Amacs I am familiar with. Since patman has his wing chassis mounted, I though it would easy for him to experiment.
    I do have a funny story about my own wings. When I first built the DSR, I made two foam core wings; both to Eppler sailplane profiles but with different chords. At my first event at Gateway I was maxed out a bit over 130 MPH. As I pulled back into the pits, a guy stopped by and introduced himself as an engineer at Boeing and asked me if I designed the wings for a 10" wing tip droop. I immediately swapped to the other wing and all was well with the world. He also pointed out that I was getting reversion out of the radiator inlet duct but that was easy to fix with a rolled piece of aluminum and some duct tape. Helped lower the water temp too!
    Marty
    Marty as happens VERY often, Ted has been confused with David, Ted is 10rmotor, I'm sccadsr31 and my profile says my full name and I always sign as David.
    On my first AMAC which was the original shop car the wing was back off the rear of the bodywork so it acted on the ground not the bodywork. The the wing is attached to the body and a support that is attached to the chassis, this is as effective as a center mount and far less hassle, additionally with a spec line car the end mount wing allows some advantages.
    The roll bar rules do not require a single piece to the dash hoop but there are some requirements that this design might need to comply with.
    While I no longer own the car it is still my playground. We have a Dauntless wing and one that Brom Clegg and I made 20 years ago, (some old FF guys will recognize Brom's name). We have tried the wing in a low position off the back bodywork and a high location off the rear bodywork, the jury is still out.
    Marty I did not have the pleasure of seeing your car but I have heard it was nice, it would be nice to see some pictures some time.
    David Arken
    Last edited by sccadsr31; 08.16.20 at 8:45 PM.

  40. #29
    Contributing Member
    Join Date
    10.08.06
    Location
    San Jose, Ca
    Posts
    714
    Liked: 89

    Default

    Quote Originally Posted by Marty Nygard View Post
    Sorry Ted, I never could keep you AMAC guys from San Jose straight.
    All good Marty just having some fun!

  41. #30
    Senior Member
    Join Date
    01.24.15
    Location
    Morgantown, WV
    Posts
    197
    Liked: 131

    Default

    If you look at Craig's picture from post 13 and then my picture from when I got the car, you can clearly see the difference. Also it was obviously cut and double sleeved in the middle of the hoop. The one shown in my later posts is a whole new main hoop..
    Forward braces are 5.75 vertically below the top as per gcr as you mentioned.
    Tubes are same size and thickness 4130 dom as original.
    I will elaborate tomorrow at work typing from my phone makes it hard...

    Quote Originally Posted by 10rmotor View Post
    How did you determine that the roll bar is 12" shorter than the original design? I'm pretty sure that roll bar is original.
    Is your upper 1" roll bar support tube supposed to be a continuous tube? I was under the impression it is supposed to be but need to go back and check. It may need an engineer signoff as this isn't as designed and homologated. What wall thickness did you use? Its hard to tell, but the upper connection to the roll bar seems lower than 6" from the top of the bar, which is the lowest it can legally be from the top.

  42. The following members LIKED this post:


  43. #31
    David Arken sccadsr31's Avatar
    Join Date
    04.24.07
    Location
    San Jose
    Posts
    272
    Liked: 83

    Default Roll Bar

    Are you intending to run this in SCCA P2 class? If you are take a few pictures of the roll bar with mods and send it to SCCA Scott Schmidt/Rick Harris and they can advise you if there any compliance issues.

    Keep the updates coming, very interesting project.

    David

  44. #32
    Contributing Member
    Join Date
    10.08.06
    Location
    San Jose, Ca
    Posts
    714
    Liked: 89

    Default

    Yes I can see the short splints on the roll hoop above the 3/4” square tube. That’s nasty and I’m surprised Scca let that through. Definitely not as built.

  45. #33
    David Arken sccadsr31's Avatar
    Join Date
    04.24.07
    Location
    San Jose
    Posts
    272
    Liked: 83

    Default Front Shocks

    Standing up the front shocks will help both the turn in and off corner performance so you might want to consider this change, very easy and virtually no cost except some 0.090 thk 4130. The motion ratio change was from roughly .6 to .75, the stock rear is about .85
    That is a mechanical droop limiter, never liked using the shocks for droop limiting, this set up also made ride height fully and easily adjustable. They look a little agricultural however the design evolved from some lighter ones that would break from time to time, these never broke.
    Attached Thumbnails Attached Thumbnails Click image for larger version. 

Name:	AMAC Stock Shock.JPG 
Views:	1475 
Size:	50.6 KB 
ID:	93820   Click image for larger version. 

Name:	610 (2).jpg 
Views:	1468 
Size:	57.4 KB 
ID:	93821   Click image for larger version. 

Name:	DroopLimit1.jpg 
Views:	1484 
Size:	101.4 KB 
ID:	93822  


  46. #34
    Senior Member Farrout48's Avatar
    Join Date
    04.22.17
    Location
    Florida
    Posts
    241
    Liked: 133

    Default

    David - Thanx to your guidance in the past, I had already added those stand-up pieces to the car.
    Craig Farr
    Stohr WF1 P2

  47. #35
    Contributing Member
    Join Date
    10.08.06
    Location
    San Jose, Ca
    Posts
    714
    Liked: 89

    Default

    Quote Originally Posted by Farrout48 View Post
    David - Thanx to your guidance in the past, I had already added those stand-up pieces to the car.
    Craig, did you extend the height of the rollbar?

  48. #36
    Senior Member Farrout48's Avatar
    Join Date
    04.22.17
    Location
    Florida
    Posts
    241
    Liked: 133

    Default

    While I had the car the rollbar remained the same as when I got the car from Dick Boggs.
    Craig Farr
    Stohr WF1 P2

  49. #37
    Contributing Member
    Join Date
    10.08.06
    Location
    San Jose, Ca
    Posts
    714
    Liked: 89

    Default

    Quote Originally Posted by Farrout48 View Post
    While I had the car the rollbar remained the same as when I got the car from Dick Boggs.
    Did it have splints in it to make it higher?

  50. #38
    Senior Member Farrout48's Avatar
    Join Date
    04.22.17
    Location
    Florida
    Posts
    241
    Liked: 133

    Default

    Quote Originally Posted by 10rmotor View Post
    Did it have splints in it to make it higher?
    There was no external evidence of any in the pictures I have of it. Looks like one seamless piece .
    Craig Farr
    Stohr WF1 P2

  51. #39
    Member
    Join Date
    03.23.12
    Location
    Marysville, WA
    Posts
    37
    Liked: 5

    Default Roll bar height

    Quote Originally Posted by Farrout48 View Post
    There was no external evidence of any in the pictures I have of it. Looks like one seamless piece .
    I never changed the roll bar height ever. If I remember I had to turn side ways to slither into it. It was really a test bed for a lot of ideas that George and I had. We had a turbo 1000cc in it, then a turbo 631 and then GSXR 1000. Updated front brakes. We tested the air scoop on the dyno and George said it didn't hurt the output, that was with dyno ceiling fans, so draw your own conclusions. Just a great car, with never any crashes or serious offs. Glad to see it getting rejuvenated.

    Dick Boggs

  52. #40
    Member
    Join Date
    03.23.12
    Location
    Marysville, WA
    Posts
    37
    Liked: 5

    Default Rollbar height

    Quote Originally Posted by Racerex1 View Post
    I never changed the roll bar height ever. If I remember I had to turn side ways to slither into it. It was really a test bed for a lot of ideas that George and I had. We had a turbo 1000cc in it, then a turbo 631 and then GSXR 1000. Updated front brakes. We tested the air scoop on the dyno and George said it didn't hurt the output, that was with dyno ceiling fans, so draw your own conclusions. Just a great car, with never any crashes or serious offs. Glad to see it getting rejuvenated.

    Dick Boggs
    !0R, Ted Arken came up and drove the turbo 631 at Seattle. Need to ask him about his experience.

    Dick

Page 1 of 3 123 LastLast

Thread Information

Users Browsing this Thread

There are currently 1 users browsing this thread. (0 members and 1 guests)

Posting Permissions

  • You may not post new threads
  • You may not post replies
  • You may not post attachments
  • You may not edit your posts
  •  


About Us
Since 2000, ApexSpeed.com has been the go-to place for amateur road racing enthusiasts, bringing together a friendly community of racers, fans, and industry professionals. We're all about creating a space where people can connect, share knowledge, and exchange parts and vehicles, with a focus on specific race cars, classes, series, and events. Our community includes all major purpose-built road racing classes, like the Sports Car Club of America (SCCA) and various pro series across North America and beyond. At ApexSpeed, we're passionate about amateur motorsports and are dedicated to helping our community have fun and grow while creating lasting memories on and off the track.
Social