


Finally got around to doing some work on the Lola. Spent last weekend getting my IMSA RS daytona cleaned up and ready for a trackday I did.
I'm continuing to attack the corrosion around the car in a less the organized manner. Any bracket or bolt that I can get off is being removed, treated for rust, and painted. I purchased a steam cleaner and went to town on the gearbox. Cleaned up pretty good. The tub is next for a steam clean to get decades of dust and grime out of all the nooks and cranies.
I have been mostly focusing on the rear suspension still. Disassembled, cleaned, inspected, and put back together both rear damper pivot assemblies. The bearings were in decent enough shape so I repacked them. They are a Timken standard bearing, so I could replace them down the road if necessary, however they are all etched with thre cars serial number, so I'm saving what I can. Also ended up having to get another set of bushings for the rear damper mounts made. I tried 4 or 5 different sets of rod end bearings, but couldn't find a skinny enough ball to work with what I had around.
Got the ARB rods epoxied in black. Originally I think it would be a black oxide coating, but for now this should be fine. At some point I may gather everything and send it out for powder coat, but that's the least of my worries.
The hardware on the rear is a little mixed and matched between the proper aircraft grade hardware and hardware store stuff. I have access to all of the correct hardware at work, but I've taken the year off. Whenever I go back I'll take a goodie bag home and replace all of it.
Lastly, I addressed some issues in the cockpit. The sway bar control handles are corroded so badly that they can't be moved. I disassembled it as much as I could and tossed it in the evaporust bucket. I'll check in on it in a few days and see if it's worked enough of rust out to rebuild it properly. Also decided to take apart the cockpit boost controller. It was similarly rusted stuck along with its mounting hardware. The inside is pretty gnarly, but I'm gonna try and get it cleaned up. This part will just be for looks anyhow. I do have a brand new spare one, but I'd rather not waste it to just look at if I don't have to.
Cheers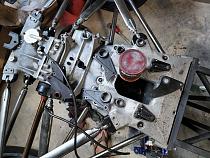

 Reply With Quote


 Graham


